
How to Label Pacifiers for Daycare
This post may contain affiliate links. If you buy through the link, I may earn a commission. Learn More.
Losing small items at daycare is a big pain. The last thing a busy parent need is another trip to the store to replace another lost pacifier.
It’s more convenient for everyone (especially you) if you take a few small steps to label your baby’s pacifiers before you say goodbye for the day.
*FYI, some of the links in this article about how to label pacifiers for daycare may be affiliate links. If you click and make a purchase, we may get a commission (at no extra cost to you). For more info, please see our disclaimer.
How Do You Label a Pacifier for Daycare?
There are many ways to label a pacifier, but using a pacifier clip with a leash is the easiest. Clips and leashes keep the pacifier close to your child at all times. They can be purchased pre-made, or you can make your own in less than an hour.
Look around the internet, and you will find many different ideas about labeling pacifiers for daycare.
Some suggest you should monogram each pacifier, engrave your child’s name into the plastic or even decoupage the child’s face onto the backside of the binky.
Related: Why is My Baby Refusing to Use a Pacifier?
A Real-World Solution for Labeling Pacifiers
Let’s face it, if you have the kind of time on your hands that it takes to decoupage a binky, then you could probably build your own unique pacifier and a robot nanny to ensure it’s never lost.
Quickest Way to Label a Pacifier for Daycare
The easiest way to make sure your child’s pacifier stays with them and doesn’t get passed around to other children is with a custom pacifier clip.
Materials Needed
This is the easiest, fastest, and most convenient way to keep a pacifier labeled. The leash handily fits on the pacifier, and then it is clipped to your child’s clothing. Even if it becomes unclipped, the leash stays in place.
DIY Pacifier Clips: How to Make Your Own for Daycare
Perhaps you are a crafty parent who prefers to make your own. If this is the case, you are in luck. I am a DIY mom.
I love putting my own spin on projects while glaring at my husband as he says, “You know you can buy those things pre-made, right?”
Materials Needed
Making the Pacifier Leash and Clip
Making a pacifier leash is so easy.
It will probably take you longer to read the steps involved than it will take to actually make the leash and clip.
They are also cute and handy. You might want to make one for each pacifier!
One word of caution: Other parents may start asking you to make pacifier leashes for their children as well.
Step One: Gather the Supplies
Pull together everything you need to make your pacifier. All items are on the supplies list above. Make sure your beads are BPA-free, food-safe silicone. Your baby will chew on them.
Step Two: Make the Name
Find all of the letters for your baby’s name and put them in a row. If you plan on making multiple leashes, you may want to buy extra packages of letters to ensure you have enough.
Step Three: Organize Bead Colors
You can plan exactly how you want the pacifier clip to look in advance by putting the beads in a pattern on either side of the child’s name.
The number of beads is entirely up to you, but you shouldn’t need more than four on each side of the name.
Step Four: Cut Your String
Lay your beading string along the length of the beads with a little extra on each side. Fold the string at one end and come back, continuing to follow the length of the beads.
This should give you enough string for all the beads with extra for knots and the clip. Cut the string, remembering not to cut it too short.
You can always cut the string to be shorter later, but you can’t cut it longer.
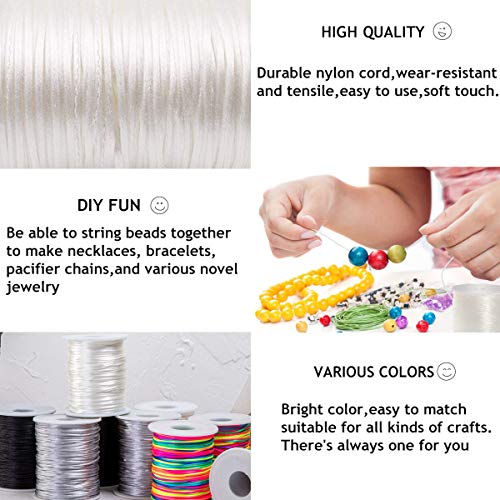
- Strong-Satin nylon cord.Made of exquisite material,safe and sturdy.colorfast, and non-fading...
- Colorful-Bright colors,made from nylon with a nice satiny sheen,soft and slippery to touch.Ends can...
- Versatile Applications-Jewelry making,sewing,braiding,crafting,beading,Chinese knot,veil trimming...
Step Five: Thread the Needle
Place one end of the string through the beading needle. Pass it through all of the beads. Keeping the thread on the needle, create a big loop of thread next to the last bead you just passed through.
Tie a knot in the thread to keep the loop in place. Pass the needle back through that same bead and all of the others.
It should come back out on the side where it started. You will have two loose ends of thread on one side of the leash and one large loop on the other.

- Package Includes: Our beading needles set comes with 12 pieces of big eye beading needles, 17 pieces...
- Size of Beads Needles: Large eye beading needles - 6 sizes, 2 pieces of each size(4.5cm/1.77in...
- Quality Material: The big eye collapsible beading needles made of high-quality metal, lightweight...
Step Six: Be Patient With Yourself
If this is your first time DIYing a pacifier clip, you might be a little frustrated.
Maybe you cut your string too short. Maybe the baby started crying while you were sorting beads, and you just now realized her name is misspelled, and you have to start over.
It happens. Take a deep breath and battle through. Once you finish making your first pacifier keeper, you’ll be able to do it in your sleep.
Step Seven: Add the Pacifier Clip
Use the two loose ends of the thread to tie the pacifier clip on. Tie it tightly and even double knot it if you wish.
Place both loose ends through the needle, and then thread those ends through the first bead. Cut off any extra thread.
Step Eight: Add the Pacifier
The large loop at the end of the clip should easily go through any pacifier handle.
Place the pacifier handle on top of the thread, and then guide the entire leash, clip end first, over the handle, and through the loop. Pull tightly.
Would You Prefer a Video?
There are plenty of tutorials on Youtube, like this one that explains how to make a teething pacifier clip.
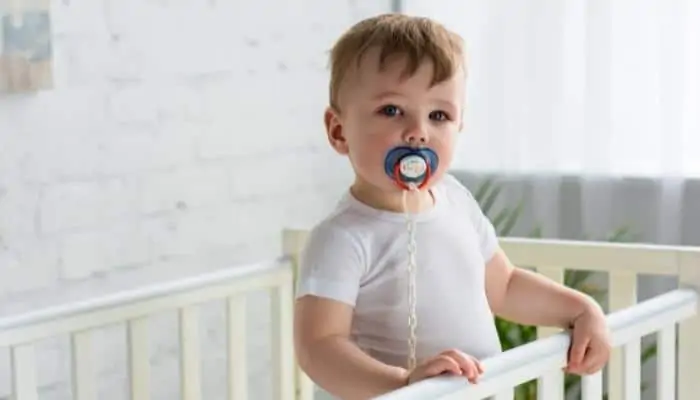
A pacifier leash with a clip helps keep pacifiers in place. The pacifier is clearly labeled and less likely to be swapped with other children at daycare.
Will you buy a pacifier leash, or will you make your own? Tell us in the comments!
Have You Read These Yet?
Here’s some other great content you might enjoy.
- Here’s How to Breakup with Your Daycare
- Daycare vs Stay at Home Mom
- How Do I Get My Baby to Sleep Without a Pacifier?